Technologies and the process of making the film opening
-The main use of technology within the project was our blog, the blog site we used was blogger which allowed us to work collaboratively as we could both contribute and discuss ideas at any time. This also helped us work better as a group when conducting group work and allowed us to focus on certain points. Here is an example of how we worked collaboratively on the blog...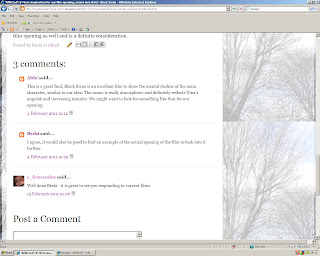
-Other uses of technology were slideboom in order to upload our powerpoint presentations onto Blogger as well as Prezi in order to make presentations and survey monkey to create an online survey which we used for our target audience research before the 'pitch' Here is the website slideboom...
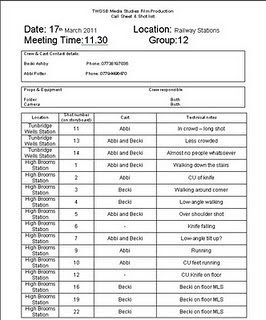
 -After discussing ideas on the blog in particular researching locations and planning which scenes and shots we would be filming, we then created risk assessment forms for each location we would use to minimize risks of our filming.
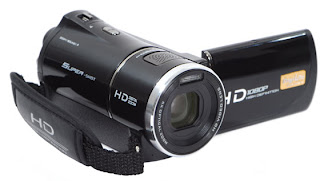
-To
film our opening we used a
1080p HD digital camcorder as well as a
tripod so we could create smooth and steady camera movements for example,
tracking shots when walking in the station shoot. Although, we did use
handi cam to shoot some shots as we felt that they suited our
style better.
-Some problems we faced when shooting were in that in some of the nature shots the camera was unsteady as a tripod was not used, this did not work in our piece so we had to re shoot some of the shots as well as cutting others so that the disjointment was not noticeable.
-For the lighting aspects of our piece the weather conditions at the time of our shoot worked really well for example in the park shots it was a sunny day therefore there was bright lighting which reflected on the happy mood we were trying to set. This contrasts to the dull lighting in the underground tunnel at High brooms station which also reflects the mood we were trying to achieve and helped to set the scene. For the bath shot we lit candles to create an atmospheric feel which anchored the footage.
-Special effects were a big part of our effects as our montage consists of a dream containing lots of illusions, focusing on certain parts of the shot as well as blurring and colour washes were main parts of our effects. Other effects such as cartoon/ black and white prints were effects used in our piece these worked particularly well in making it seem surreal and giving it a dream like feel. One problem which we encountered whilst adding effects to our footage was the lack of continuity, firstly we used a whole load of different effects which didn’t work. To solve this were started using a smaller variety of effects, this worked well in making our piece flow. Here is an example of one of the effects used in our opening...
-After all our footage was shot we had to edit it, to do this we uploaded it all on to the computer and then transferred it to the editing software, Premier. We then dragged all our footage onto the timeline. Here is the software we used...
• After this the first thing we done were placed the footage in a rough order of how we were expecting our final piece to look. We also began cutting the shots and removing/ choosing which take of a certain shot worked best. Here is a screen shot of our timeline...

-When we were left with only the footage we needed we began working through starting at the beginning and adding our special effects to each shot, this included filters, blurs, and changes in time, reverses and standard effects.
An example of this is the black and white over the murder shot...
 -We then began to work out the cutting rate of our piece and added in the blank gaps we used in order to create the effect of disjointment and follow the idea of it being a dream.
-We then looked at the brightness, contrast and saturation of our shots and ensured they followed the conventions of the genre and worked well within our concept.
-We then added transitions such as fading and dissolves so that our footage flowed and to reinforce the idea of it being a dream.
-Next we added the text screens/ titles using the font ‘moms typewriter’ as well as this we placed them into their places on the timeline and ensured that the flowed with the rest of the footage. Here is an example of our fonts...
 -Next we looked into sound and used a whole variety of sounds layered on top of each other to create the idea of confusion within the dream.
-We then did a final cut of all the footage to ensure that it cut at the right time so that the sound anchored the footage and we were happy with our final outcome.
-Next we exported our opening from premiere by clicking on the 'share' button, saving it on our personal computer and then uploading it on to YouTube so that it could be embed further to places such as the blog.
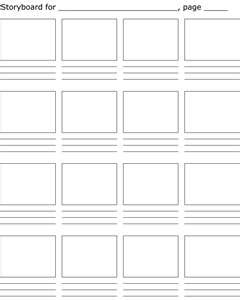
-In the process of making our film opening we both learnt a lot, in particular we both learnt how important storyboarding and planning is to ensure that you are able to get the most out of shoots. We also learnt that you should shoot more footage than needed so that you can ensure that you get the best shots as well as enough footage after editing. The rule of thirds is also key when filming as well as the 180 degree rule to ensure that the final outcome is good. Here is an example of a template used for our storyboarding...
-Our production compared to real film production is different in the respect that we did not have access to the same sorts of actors, location or equipment although I do think that we managed to create a realistic film opening. Time was another issue which made it hard to com pares to real film production but again I think we managed well in the time we were given. Although it does not look as professional as most mainstream movies, we did manage to create a good opening which followed the conventions of the genre we chose, psychological thriller. 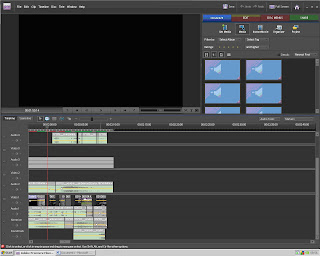
 Prefers Arthouse films but is happy to engage in mainstream cinema


 -We then began to work out the cutting rate of our piece and added in the blank gaps we used in order to create the effect of
  -Next we looked into sound and used a whole variety of sounds layered on top of each other to create the idea of confusion within the dream.





 -
-


